This guide will walk you through how to properly apply a GlassParency Ceramic or Graphene coating to get the best results possible and avoid the most common mistakes that people make before, during, and after a coating application.
COATING PREP WORK

Prepping the car for a ceramic coating is where the real work happens. That's why many people choose to trust a professional detailer to apply their coating but if you have some experience, know-how, and a controlled environment safe from the elements, it can be done at home too. No matter how high quality the coating is or how carefully it's applied, if you don't put in the proper prep work beforehand, you won't get the best results.
Before applying a coating, depending on the condition of the paint, it’ll at least need to be hand washed and detailed to remove any residual waxes, sealants, and contaminants. Most vehicles should also be clayed and receive some level of paint correction before applying a ceramic coating to guarantee the best possible end-result and avoid sealing in any contaminants or imperfections. For more info on the stages of paint correction, check out this blog post.
Recommended Prep Products:
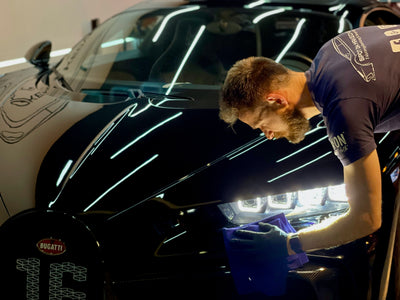
COATING APPLICATION
Once you’ve prepped the car, grab everything you'll need to apply the coating:
- Bottle of GlassParency Graphene or Ceramic Coating
- High quality, edgeless microfiber towels
- Applicator pad
Before getting started, make sure that the vehicle is cool to the touch and out of the elements. Ideally, once you're done coating the car you'll be leaving it in this safe spot for 24 hours as the coating cures.
Step-by-Step Process
1. Shake the bottle well before opening and apply several drops onto your coating applicator pad. *Make sure the cap is screwed back on tightly so it doesn’t spill, and the remaining liquid doesn’t start to harden in the bottle.

2. Start with the upper panels of the vehicle and work your way down to avoid accidentally rubbing against the coating before it cures. Apply the coating in sections using a side-to-side, top-to-bottom motion to ensure even coverage.

3. Once applied, give the coated area 2 to 4 minutes (depending on your elevation and the humidity) to “flash” or “rainbow” and allow the liquid to evaporate and begin the curing process.

4. Using a high-quality microfiber towel, buff the surface with light pressure, flipping the towel occasionally to use clean fibers. Use the same side-to-side, top-to-bottom motion as used when applying the coating. Make sure you level any high spots before the coating becomes less pliable.

Additional Layers
If you're layering the coating for added durability and longevity, make sure you allow approximately 40 to 60 minutes between layers for each section to begin curing and become "tacky" before adding the next layer. If you wait too long, the layer below may repel and prevent the next layer from properly adhering. This may result in a "foggy" appearance that will require correction.
Done! Now, it's time to let the coating cure.
COATING CURE TIME
The first 24 hours after coating your vehicle are critical for the curing process. The new coating is still rapidly hardening and it's important to avoid driving as much as possible. Exposure to any environmental contaminants can potentially result in imperfections in the coating before it has fully cured.
After 24 hours has passed, your coating is still vulnerable to some substances that can decrease the lifetime of your coating or create imperfections...
- Hard mineral water
- Abrasives or washing
- Automatic brush washes
- High or Low pH Soaps (pH Neutral only)
- Avoid parking under trees or other locations where bird droppings or tree sap may fall on the coating
If the coating comes in contact with any of the above, gently lubricate the coated surface with a pH-Neutral soap, pH-Neutral waterless wash, or coating topper such as our Boost Spray and wipe the surface with a clean, unused, high-pile microfiber towel.
If you're looking to treat your cars glass surfaces for improved safety and to make it hydrophobic as well, check out GP's Glass Treatment.
COATING CARE & MAINTENANCE
Check out our Complete Guide to Ceramic Coating Care and Maintenance to make sure you know how to protect and maintain the performance and durability of a coated vehicle for years to come.
If you have any questions, just contact us and one of our in-house experts will be happy to help out.